
WolfProxy - OpenSource
A high-performance web server written in Rust that serves PHP applications via FastCGI with native SSL/TLS support and Apache configuration compatibility.
WolfProxy is our drop in replacment for nginx and is fully compatible with nginx set up files and certbot using the –nginx parameter.
It performs much faster than NGINX and has a built in monitoring web page.
The project is OpenSource and you can download from our GitHub
A high-performance Rust-based reverse proxy server that reads and uses nginx configuration files directly.
(C) 2025 Wolf Software Systems Ltd – https://wolf.uk.com
Features
- Drop-in nginx replacement: Reads nginx sites-enabled configuration directly
- Automatic SSL/TLS: Automatically picks up SSL certificates from nginx config (Let’s Encrypt, etc.)
- Load Balancing: Full upstream support with multiple algorithms:
- Round Robin
- Weighted Round Robin
- IP Hash (sticky sessions)
- Least Connections
- Random
- Health Checking: Automatic backend health monitoring with configurable thresholds
- SNI Support: Proper Server Name Indication for multiple SSL domains
- HTTP/1.1 & HTTP/2: Full protocol support
- Monitoring Dashboard: Built-in web interface to monitor upstream servers and traffic (port 5001)
Supported nginx Directives
Server Block
listen– Port and SSL configurationserver_name– Virtual host namesroot– Document rootindex– Index fileserror_page– Custom error pagesssl_certificate/ssl_certificate_key– SSL certificatesinclude– Include other config filesgzip– Compression (header support)
Location Block
location– Path matching (prefix, exact=, regex~, case-insensitive~*, priority^~)proxy_pass– Reverse proxy to backend or upstreamproxy_set_header– Set headers for backendproxy_http_version– HTTP version for backendproxy_buffer_size/proxy_buffers– Buffer configurationproxy_connect_timeout/proxy_read_timeout/proxy_send_timeout– Timeoutsroot/alias– Static file servingtry_files– Try multiple filesreturn– Return status codes or redirectsrewrite– URL rewritingdeny/allow– Access controladd_header– Add response headers
Upstream Block
upstream– Define backend server groupsserver– Backend servers with options:weight– Server weightmax_fails– Failure thresholdfail_timeout– Recovery timeoutbackup– Backup serverdown– Mark server as down
ip_hash– Sticky sessionsleast_conn– Least connections balancingkeepalive– Connection pooling
Conditionals
if ($host = ...)– Host-based conditionsif ($request_method = ...)– Method-based conditions
Installation
Prerequisites
- Rust 1.70+ (https://rustup.rs)
- Existing nginx configuration in
/etc/nginx/sites-enabled/
Build
./build.shOr manually:
cargo build --releaseRun
./run.shOr:
./target/release/wolfproxyInstall as Service
sudo ./install_service.shThis will:
- Copy the binary to
/opt/wolfproxy/ - Create a systemd service
- Optionally stop nginx and start WolfProxy
Configuration
WolfProxy uses a simple TOML configuration file (wolfproxy.toml):
[server]
host = "0.0.0.0"
http_port = 80
https_port = 443

[nginx]
config_dir = "/etc/nginx"
auto_reload = false

[monitoring]
enabled = true
port = 5001
username = "admin"
password = "admin"
The nginx configuration is read from:
{config_dir}/sites-enabled/– Site configuration files{config_dir}/conf.d/*.conf– Additional configuration files
Example nginx Configuration
WolfProxy will read standard nginx configuration like:
upstream backend {
    ip_hash;
    server 10.0.10.105 max_fails=3 fail_timeout=360s;
    server 10.0.10.102 max_fails=3 fail_timeout=360s;
    server 10.0.10.103 max_fails=3 fail_timeout=360s;
}

server {
    listen 80;
    listen [::]:80;
    server_name example.com;

    location / {
        return 301 https://$host$request_uri;
    }
}

server {
    listen 443 ssl;
    listen [::]:443 ssl;
    server_name example.com;

    ssl_certificate /etc/letsencrypt/live/example.com/fullchain.pem;
    ssl_certificate_key /etc/letsencrypt/live/example.com/privkey.pem;

    location / {
        proxy_pass http://backend;
        proxy_set_header Host $http_host;
        proxy_set_header X-Real-IP $remote_addr;
        proxy_set_header X-Forwarded-For $proxy_add_x_forwarded_for;
        proxy_set_header X-Forwarded-Proto $scheme;
        proxy_http_version 1.1;
        proxy_set_header Connection "";
    }
}
Migration from nginx
- Stop nginx:
sudo systemctl stop nginx - Install WolfProxy:
sudo ./install_service.sh - Start WolfProxy:
sudo systemctl start wolfproxy - Verify: Check your sites are working
- Disable nginx:
sudo systemctl disable nginx - Enable WolfProxy:
sudo systemctl enable wolfproxy
Logging
Set the RUST_LOG environment variable to control log level:
RUST_LOG=debug ./target/release/wolfproxyLevels: trace, debug, info, warn, error
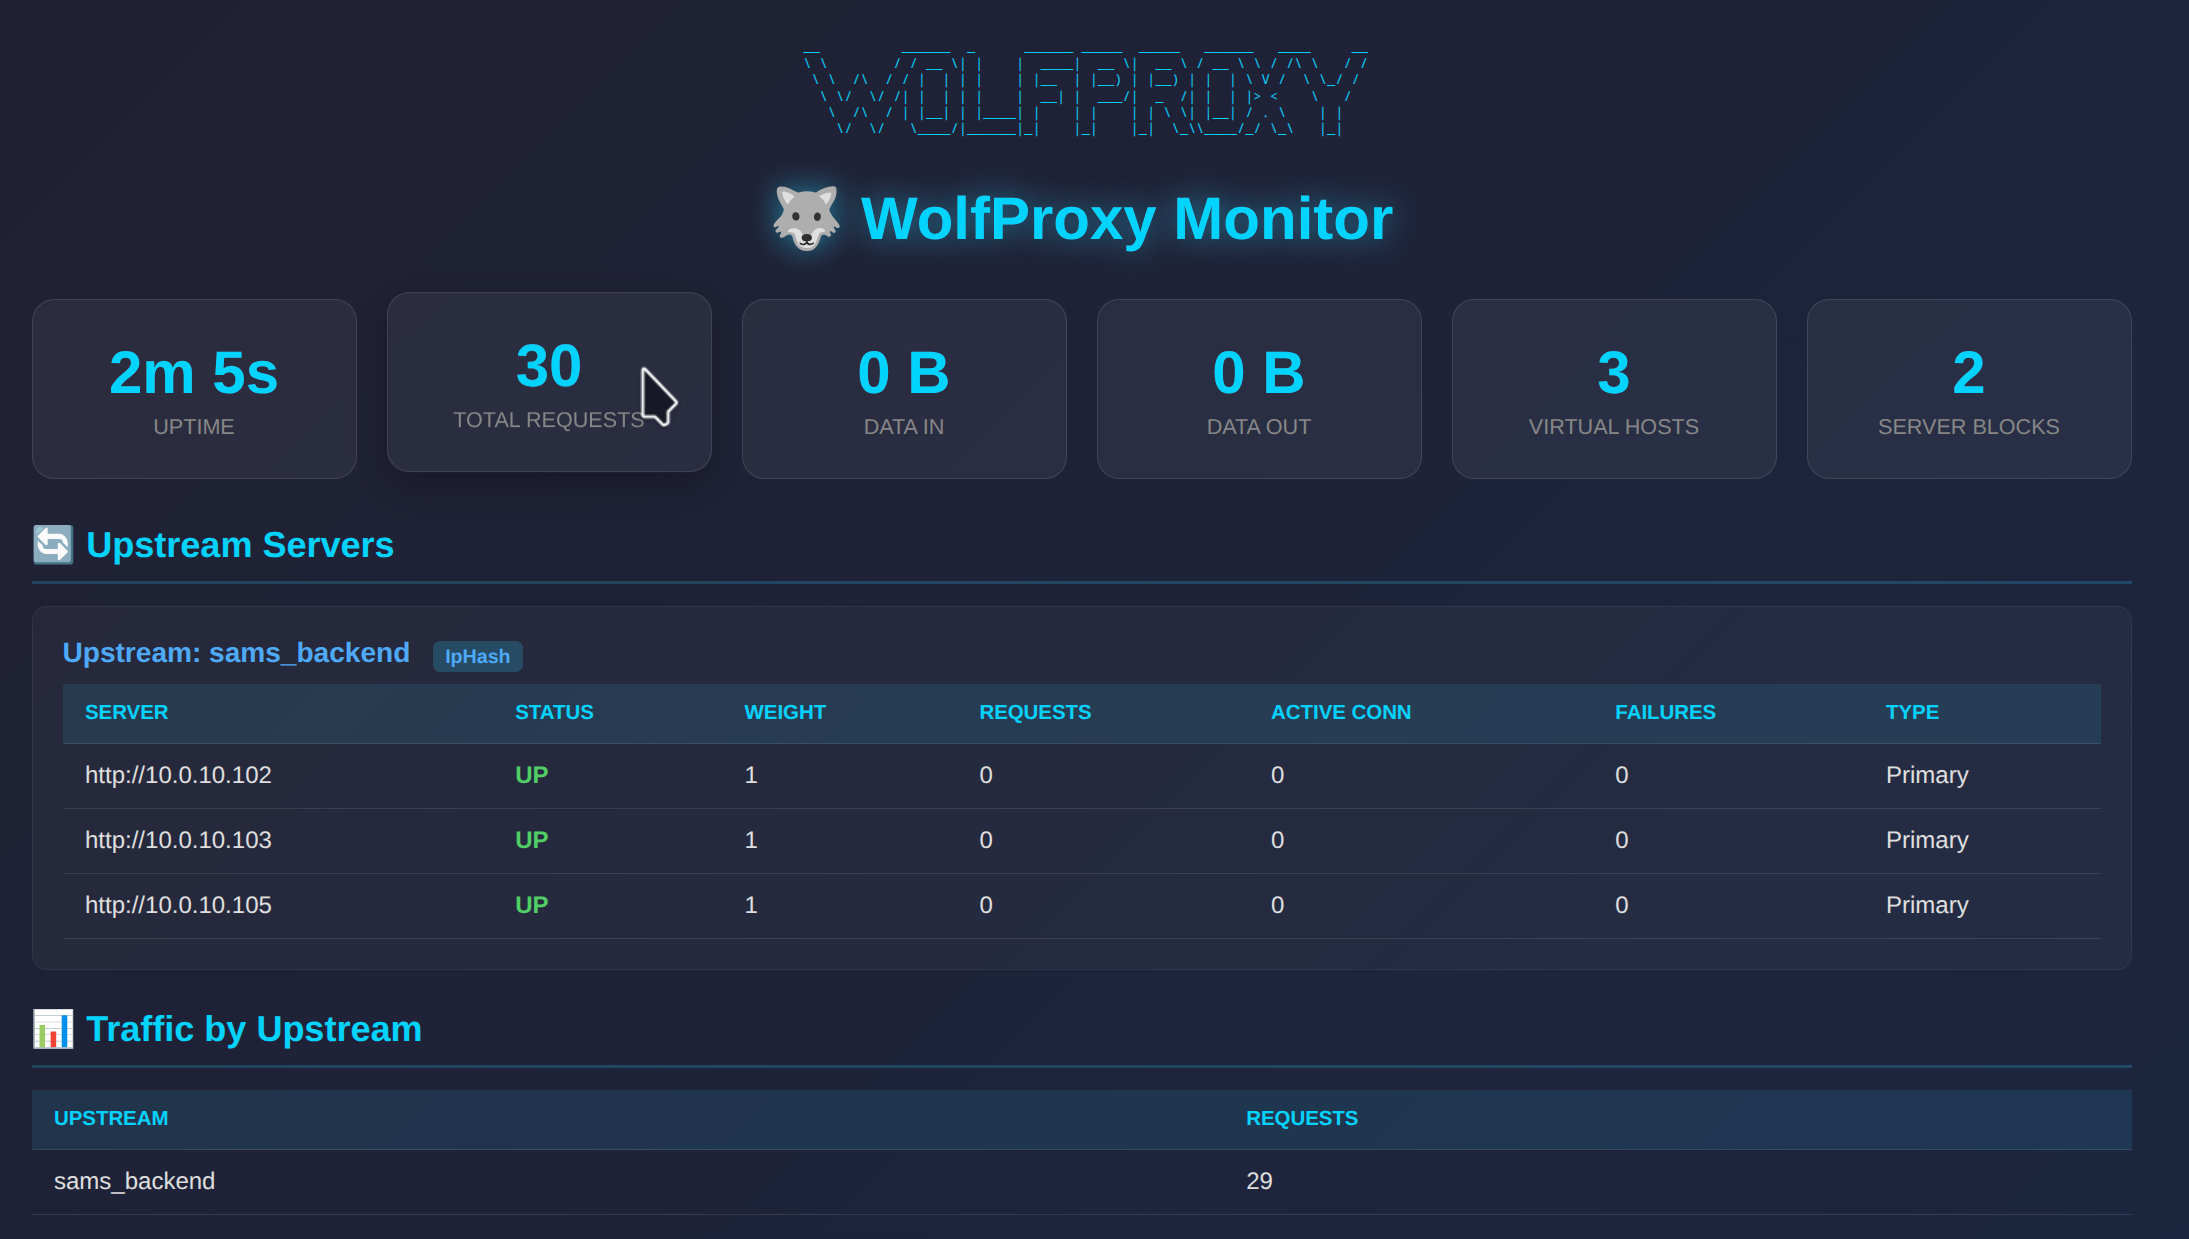
Monitoring Dashboard
WolfProxy includes a built-in monitoring dashboard accessible at http://your-server:5001/.
Features
- Real-time stats: Uptime, total requests, data in/out
- Upstream monitoring: View all backend servers with their status (UP/DOWN)
- Health metrics: Active connections, request counts, failure counts per server
- Traffic by upstream: See request counts per upstream group
- Load balancing info: Shows load balancing method per upstream group
- Auto-refresh: Dashboard updates every 5 seconds
- JSON API: Available at
/statsfor programmatic access - Settings page: Change username/password via web interface at
/settings
Configuration
[monitoring]
enabled = true       # Enable/disable the monitoring server
port = 5001          # Port for the monitoring interface
username = "admin"   # HTTP Basic Auth username
password = "admin"   # HTTP Basic Auth password
Changing Credentials
You can change the monitoring credentials in two ways:
- Via Web Interface: Navigate to
http://your-server:5001/settingsand use the form to update credentials - Via Config File: Edit
wolfproxy.tomland restart the service
Security
The monitoring dashboard is protected with HTTP Basic Authentication. Change the default credentials in production!
Comparison with nginx
| Feature | nginx | WolfProxy |
|---|---|---|
| Configuration | nginx native | nginx native (reads directly) |
| Memory Usage | Low | Very Low |
| Performance | Excellent | Excellent |
| SSL/TLS | Yes | Yes (auto-detect from config) |
| HTTP/2 | Yes | Yes |
| Load Balancing | Yes | Yes |
| Built-in Monitoring | No (requires third-party) | Yes (web dashboard) |
| Lua Scripting | Yes | No |
| Module System | Yes | No (but extensible in Rust) |
WordPress Behind WolfProxy
When running WordPress behind WolfProxy (or any reverse proxy), you may encounter issues such as:
- “Cookies are blocked or not supported by your browser” login errors
- Redirect loops
- Mixed content warnings
- Session issues
Recommended nginx Configuration for WordPress
For WordPress sites, use this location block configuration:
server {
    listen 443 ssl;
    server_name your-wordpress-site.com;

    ssl_certificate /etc/letsencrypt/live/your-wordpress-site.com/fullchain.pem;
    ssl_certificate_key /etc/letsencrypt/live/your-wordpress-site.com/privkey.pem;

    location / {
        proxy_set_header Host $host;
        proxy_set_header X-Real-IP $remote_addr;
        proxy_set_header X-Forwarded-For $proxy_add_x_forwarded_for;
        proxy_set_header X-Forwarded-Proto $scheme;

        # Cookie handling for WordPress
        proxy_set_header Cookie $http_cookie;
        proxy_pass_header Set-Cookie;
        proxy_cookie_path / /;

        # Disable buffering for better cookie handling
        proxy_buffering off;

        proxy_pass http://backend_servers;
    }
}
WordPress wp-config.php Settings
Add these lines to your wp-config.php file (before “That’s all, stop editing!”):
/**
 * Reverse Proxy Configuration
 * Required when WordPress is behind a reverse proxy like WolfProxy
 */

// Trust the proxy's X-Forwarded-Proto header for HTTPS detection
if (isset($_SERVER['HTTP_X_FORWARDED_PROTO']) && $_SERVER['HTTP_X_FORWARDED_PROTO'] === 'https') {
    $_SERVER['HTTPS'] = 'on';
}

// Trust X-Forwarded-For for real client IP
if (isset($_SERVER['HTTP_X_FORWARDED_FOR'])) {
    $forwarded_ips = explode(',', $_SERVER['HTTP_X_FORWARDED_FOR']);
    $_SERVER['REMOTE_ADDR'] = trim($forwarded_ips[0]);
}

// Force SSL for admin (recommended)
define('FORCE_SSL_ADMIN', true);

// Optional: Set cookie domain if you have issues with subdomains
// define('COOKIE_DOMAIN', 'your-wordpress-site.com');

// Optional: Define site URL to prevent redirect loops
// define('WP_HOME', 'https://your-wordpress-site.com');
// define('WP_SITEURL', 'https://your-wordpress-site.com');
Troubleshooting WordPress Cookie Issues
Clear your browser cookies for the WordPress site after making configuration changes
Check that your site URL is correct in WordPress Settings → General (Site URL and WordPress URL should both use
https://)Verify headers are being passed by checking your server logs or using browser developer tools to inspect request/response headers
If using load balancing with multiple backends, ensure you’re using
ip_hashfor sticky sessions:upstream backend_servers { ip_hash; server 10.0.10.101; server 10.0.10.102; }
Check for redirect loops – if WordPress and your proxy disagree about HTTP vs HTTPS, you’ll get infinite redirects. The
X-Forwarded-Protoheader andwp-config.phpsettings above should fix this.
License
MIT License – See LICENSE file
Support
- Website: https://wolf.uk.com
- Issues: GitHub Issues